Configuring WireGuard on pfSense 21.02 and Android
Note: After publishing this article the WireGuard package was removed from FreeBSD and subsequently pfSense. An updated article which leverages the WireGuard package from the Package Manager, and which is configured slightly different, can be found at Configuring WireGuard Package on pfSense 21.05 and Android
With the recent release of pfSense 21.02 (and 2.5.0) one noteworthy change is the inclusion of WireGuard as a Virtual Private Network (VPN) provider. This guide covers configuring a WireGuard server on pfSense and a WireGuard client on Android.
The requirements for this deployment were:
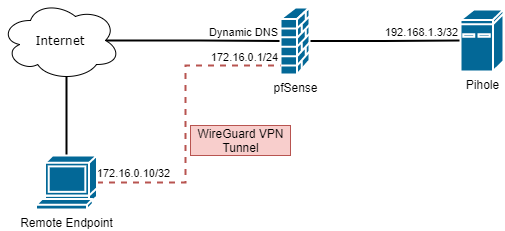
- Create a full tunnel VPN allowing “road warrior” clients the ability to egress all traffic from pfSense, and
- Allow clients the ability to perform name resolution to an on-premises server (e.g. Pihole).
To help conceptualize this, a simple network diagram was created.
Configuring the Server
Setting up the server is relatively quick in comparison to alternatives such as OpenVPN. It involves:
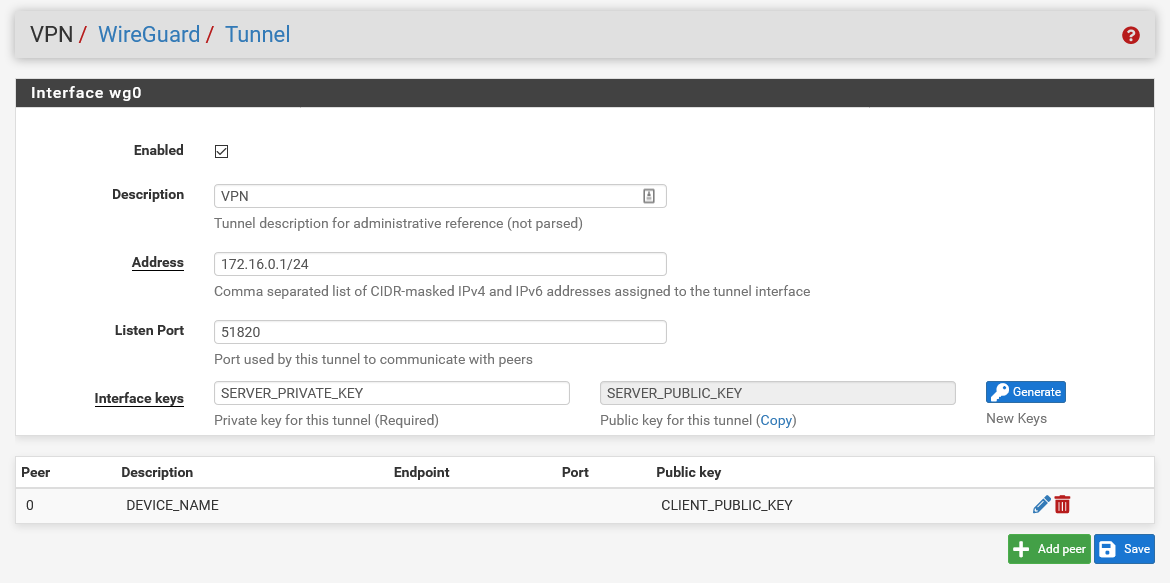
- Adding a tunnel at
VPN > WireGuard, - Enabling the tunnel,
- Configuring the server’s port,
- Generating the server’s public/private key pair, and
- Configuring the server’s public/private key pair.
An additional item not included in the list above is configuring the server’s IP address and network subnet. In this example the WireGuard subset is configured as 172.16.0.x/24 and the server is bound to the first address (172.16.0.1).
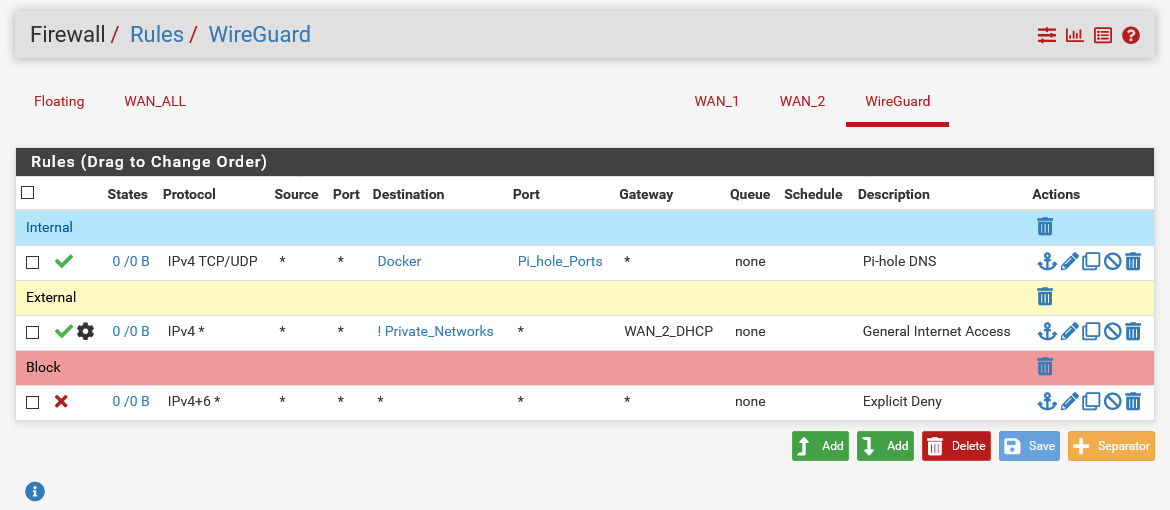
After setting up the server, the next step is to configure firewall rules for the WireGuard interface under Firewall > Rules > WireGuard. For this specific deployment the following Access Control Lists (ACLs) were deployed:
- Allow clients access to the internal name resolution server,
- Allow clients access to the Internet, and
- Restrict all internal communication that was not explicitly allowed above.
While the image belows shows how I accomplished this, it is not the only way. For someone not aiming to perform segmentation with their initial deployment these ACLs may be substituted for an allow any/any rule.
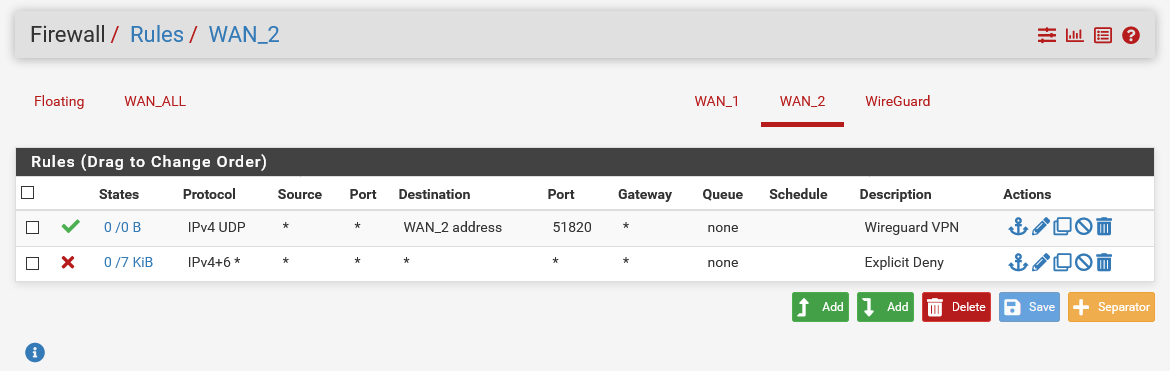
Finally, after configuring the firewall rules for the WireGuard interface itself; one needs to permit external access to the server. This involves deploying a firewall rule to the WAN interface under Firewall > Rules > WAN. This should be configured to allow traffic to the port that was configured when setting up the WireGuard server.
Configuring the Client
Now that the server is configured we turn our focus to the client (a.k.a peer). This involves configuring it as a peer in WireGuard on pfSense and configuring it on the device itself.
First we must generate a new public/private key pair for the Android device. Then we must exchange public keys between the Android device and pfSense.
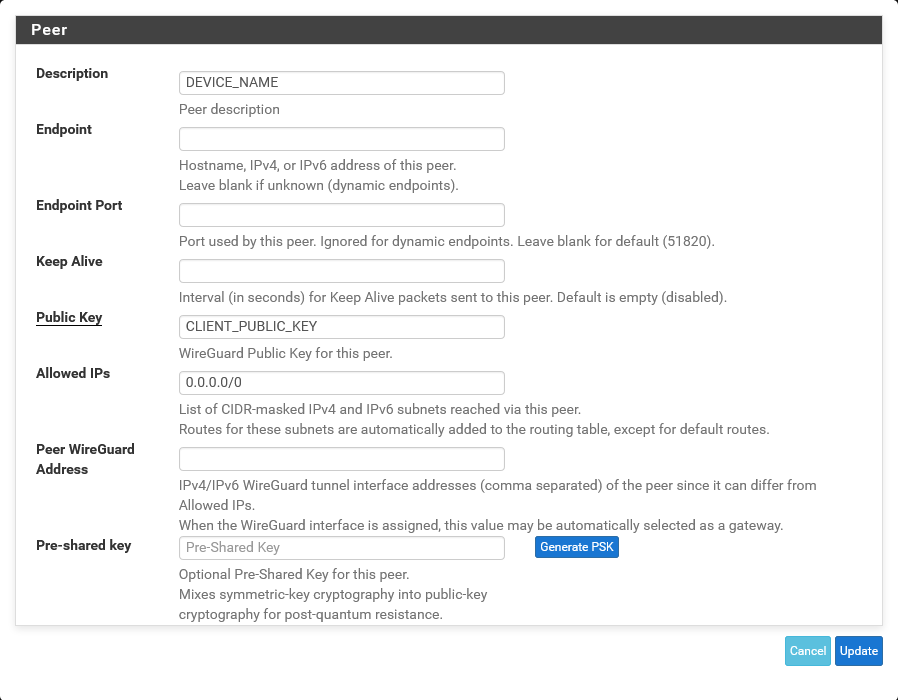
After the key exchange is completed the Android peer can be configured on the WireGuard server. To complete this navigate to VPN > WireGuard > Edit Tunnel > Add Peer. Within this screen one can set a description for the peer, the public key for the peer, and what network addresses it will be allowed to access. Since the original objective was to create a full tunnel VPN the “Allowed IPs” were configured to 0.0.0.0/0. Access to additional internal resources are restricted through the ACLs configured when setting up the server.
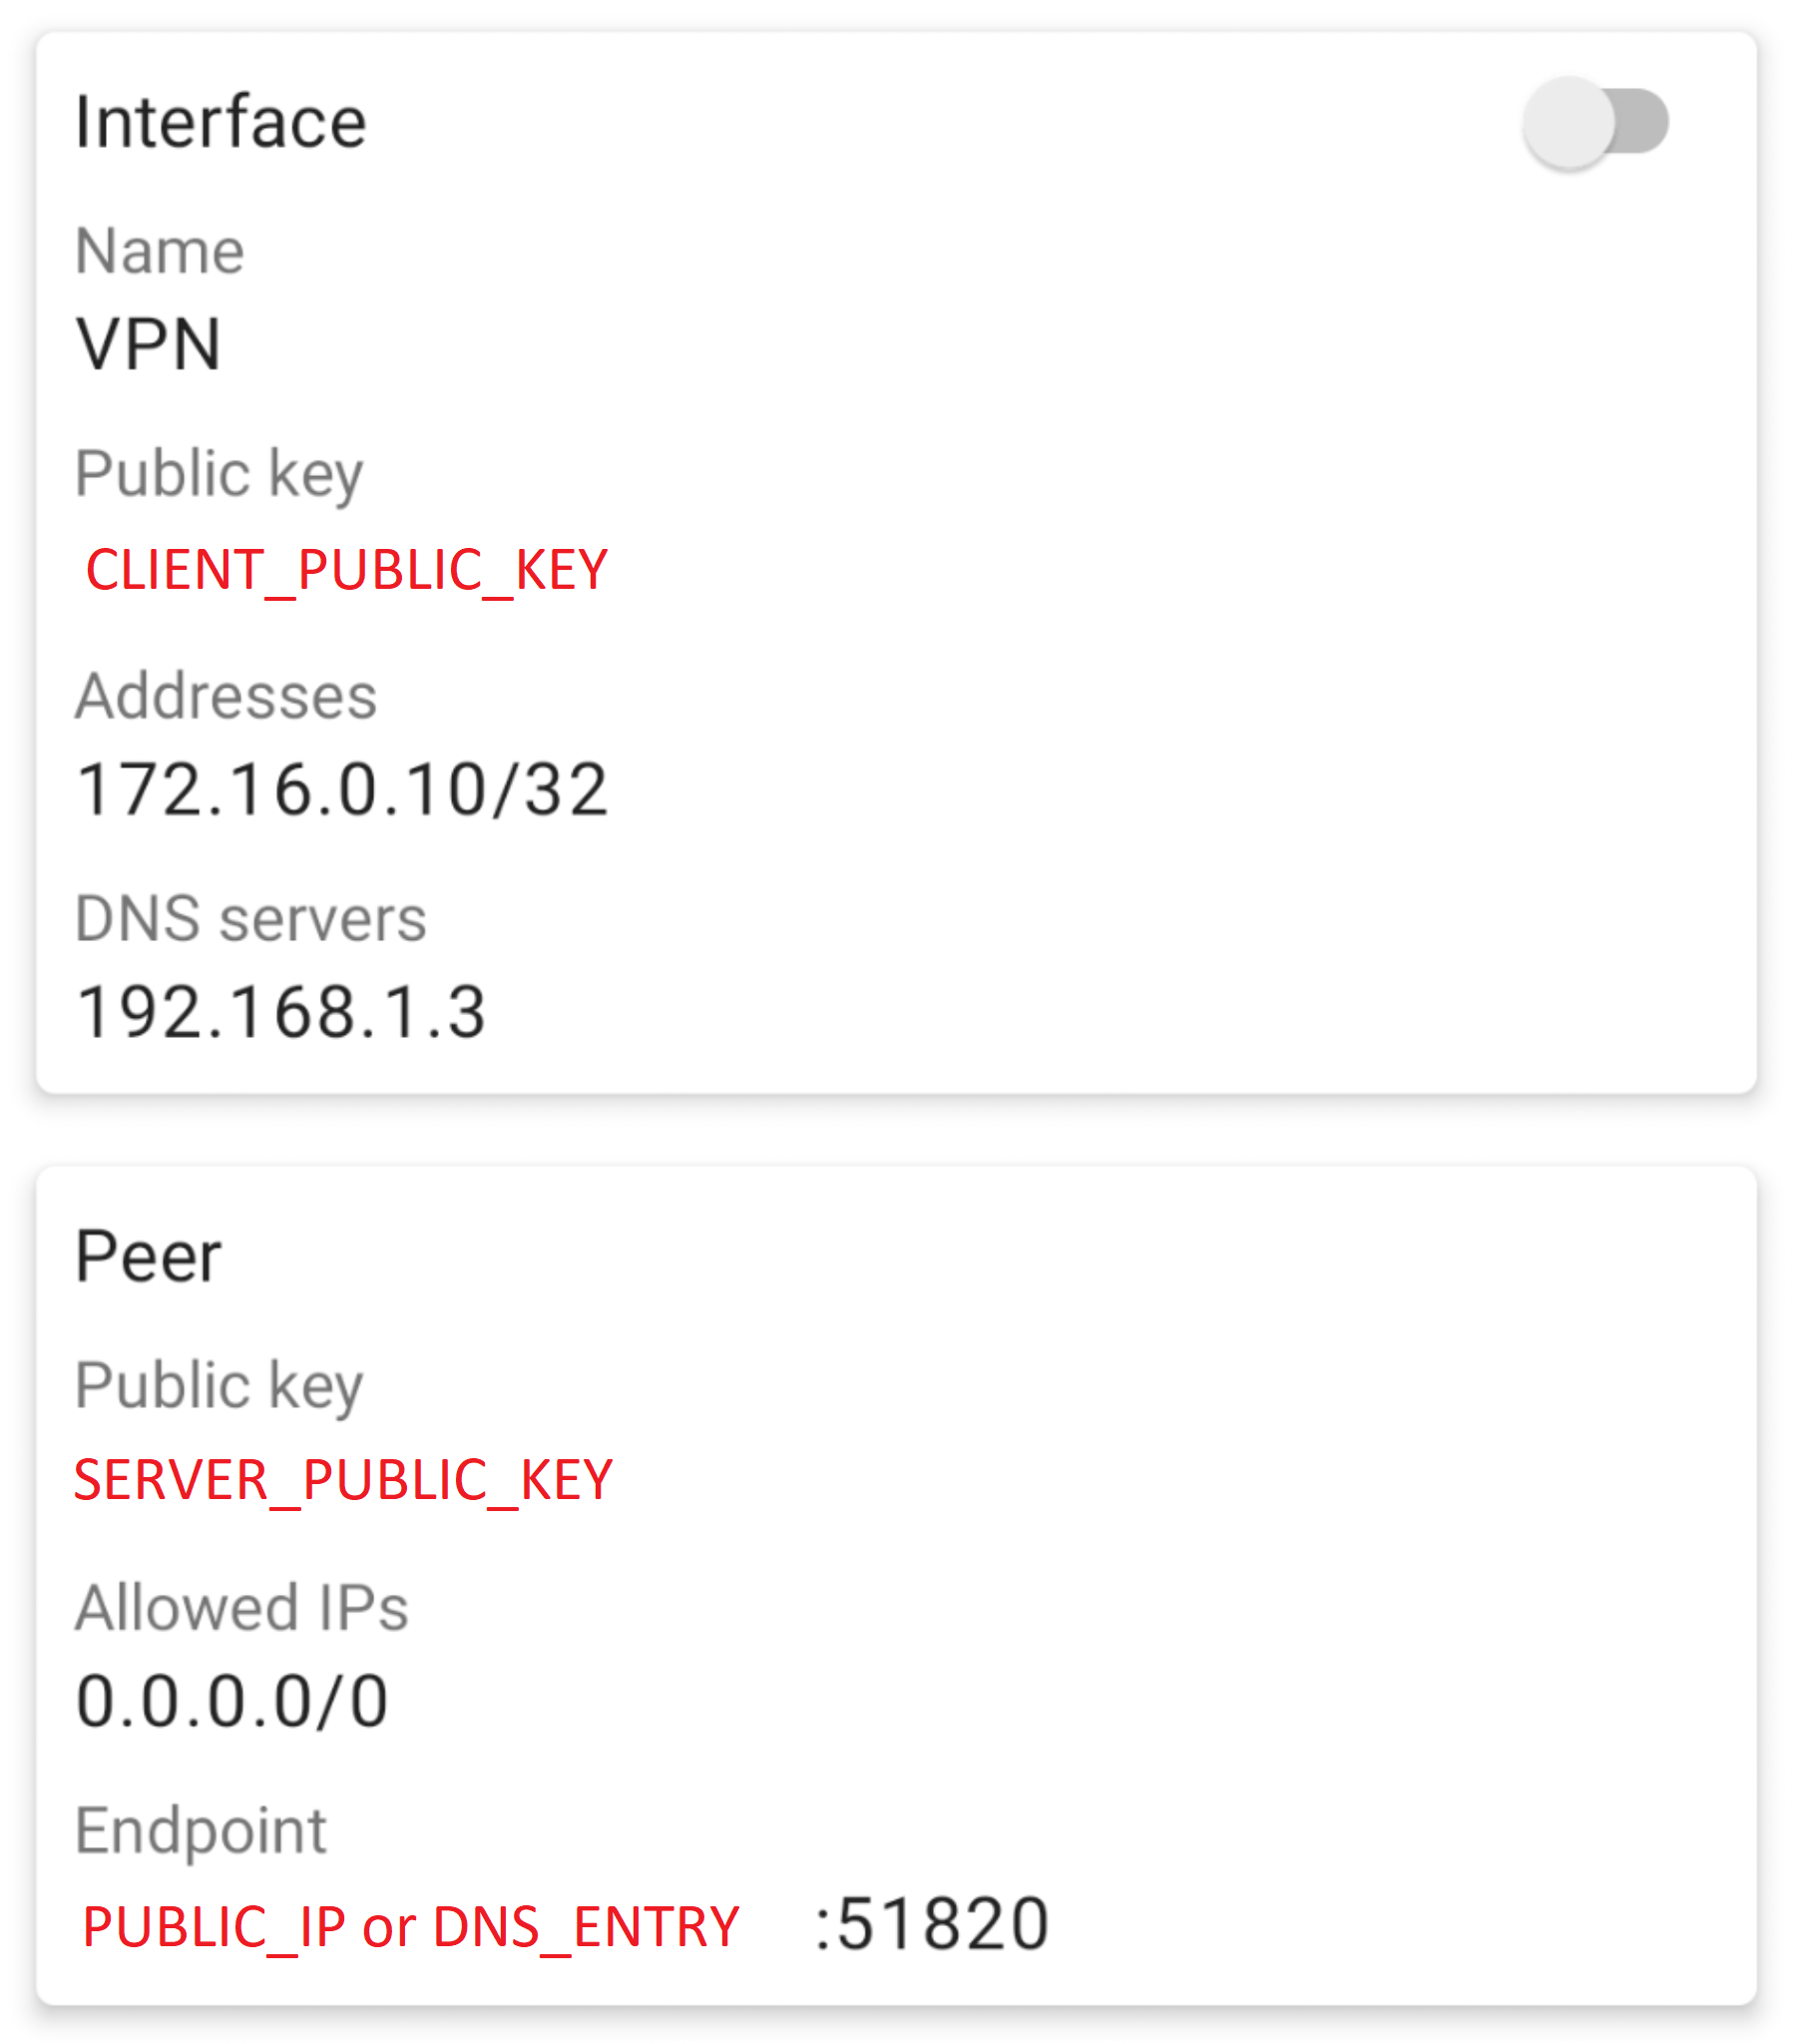
Finally, the Android client needs to be configured. As illustrated in the image below the client is setup with its public/private key pair. It is also configured with a static address within the subnet configured earlier. Also, it is configured with an explicit DNS server in order to leverage the on-premises name resolution server.
Additionally, the WireGuard server is configured as a peer of the Android device. This involves installing the server’s public key, configuring the public address (or domain name) of the server, and setting up the “Allowed IPs” to establish a full tunnel and discussed above.
After completing the configuration, one should be able to turn on the Android VPN client and communicate to the Internet through the VPN tunnel.